Last Updated on June 19, 2023 by Michael Morten Sonne
Intoduction
What is Azure DevOps
Azure DevOps is a suite of cloud-based tools designed to help software development teams plan, build, and deploy applications with greater speed and efficiency. It includes a range of tools and services for collaboration, source control, continuous integration and delivery, and project management.
Azure DevOps provides a centralized platform for teams to manage their projects, track work items, collaborate on code changes, automate build and deployment processes, and monitor application performance. It supports a variety of programming languages and platforms, including .NET, Java, Node.js, and Python, and integrates with a range of third-party tools and services.
Overall, Azure DevOps is designed to help development teams streamline their workflows, reduce time-to-market, and deliver high-quality applications to customers more quickly and reliably.
Here you can see it like GitHub to – the tools have many of the same features and of cource not totaly the same. Here in this post, we hold it to Azure DevOps 😉
Why this post
I personally use Azure DevOps, and here I use the Pipelines to etc. sync my Azure DevOps Backup tool from my Azure DevOps Org to my public GitHub profile where you can see it, and download it to if you will!
You can find it here to, try it out: michaelmsonne/AzureDevOpsBackupTool: Azure DevOps Backup – For Git Projects and is using the API for Azure DevOps (github.com) 😉
It was easy back in time to setup, I can login using my primary Microsoft account in my private Azure AD tenant and controll all the stuff I will there in a central way – that´s why im using it (and it free to for fewer than 5 users too!) 🤑
And then I’m just tired of PAT (Personal Access Tokens) expiring all the time, so when you can make use of this and update secrets from a central place for all pipelines, is only smart! 🤪
Pipeline secrets
Why use an azure key vault for azure devops pipeline secrets over etc. PAT (Personal Access Tokens)
Azure Key Vault is a secure storage solution designed to help safeguard cryptographic keys, certificates, and other sensitive information. Azure DevOps pipeline secrets, such as passwords, access keys, and other authentication tokens, are sensitive pieces of information that should never be stored in plain text in source code or configuration files!
Instead, these secrets should be securely stored in a centralized location and accessed only by authorized individuals or processes 🔐
Using an Azure Key Vault for Azure DevOps pipeline secrets provides several benefits:
- Security: Azure Key Vault is designed to provide strong protection for sensitive data, with features such as access policies, role-based access control, and hardware security modules. This can help reduce the risk of data breaches or unauthorized access to sensitive information.
- Management: With Azure Key Vault, you can centralize the management of your secrets and reduce the risk of secrets being leaked or lost. You can easily create, manage, and revoke secrets as needed, and track usage and access through auditing and logging features.
- Integration: Azure Key Vault integrates seamlessly with Azure DevOps, allowing you to securely store and access your pipeline secrets directly from your pipelines – so smart! 🤓🔐
This can help simplify your deployment process and reduce the risk of errors or security issues.
Overall, using an Azure Key Vault for Azure DevOps pipeline secrets is a best practice for ensuring the security and integrity of your applications and data. It can help reduce the risk of security breaches, simplify management, and provide a more secure and reliable deployment process.
Why not use static PAT (Personal Access Tokens) in Azure DevOps Pipelines
Static Personal Access Tokens (PATs) are long-lived access tokens that can be used to authenticate with Azure DevOps services. While they can be convenient to use, they are not recommended for use in Azure DevOps pipelines for several reasons:
- Security: Static PATs are long-lived and not tied to a specific user or process, making them more susceptible to misuse or unauthorized access. If a static PAT is compromised, an attacker could potentially gain access to all resources that the token has access to.
- Compliance: Many compliance regulations and best practices require that access tokens and credentials be rotated on a regular basis to reduce the risk of unauthorized access. Using static PATs makes it difficult to comply with these regulations and best practices.
- Traceability: When a static PAT is used in a pipeline, it can be difficult to trace who has used it and when. This can make it challenging to investigate security incidents or troubleshoot pipeline issues.
Overall, while static PATs can be convenient to use, they are not recommended for use in Azure DevOps pipelines due to their security, compliance, and traceability limitations. Instead, Azure DevOps pipelines offer a range of more secure and flexible authentication options that can help you better manage and secure your pipelines and resources.
Create an Azure KeyVault
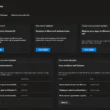
- Log in to the Azure portal and search for Key vaults, select the subscription you want to create the KeyVault in ala this
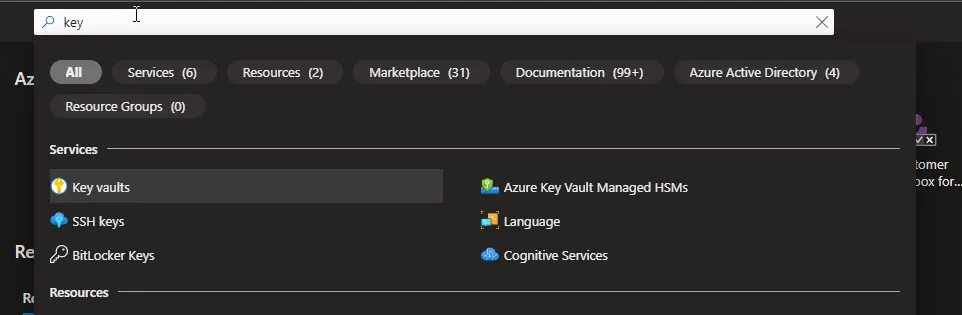
Click on Create from the left-hand menu, then search for “KeyVault” in the search box. Here is a direct link also you can click on to take you direct to the page: Create a key vault – Microsoft Azure
- Enter a unique name for your KeyVault and choose the subscription, resource group, and region where you want to create it. You can also configure additional settings such as access policies and advanced access policies, if needed.

- Click Next to configure access policies for the KeyVault. You can add and configure access policies for specific users, groups, or applications that need to access the KeyVault.
- Click Next to configure networking settings for the KeyVault, such as virtual network integration, private endpoint, and network rules.
Later you can etc. writelist your own public IP address as Azure DevOps is not trusted Microsoft service, because we have Azure DevOps market place full of 3rd party plugins, which are not created and maintained by Microsoft.
I recommend not to have the hole public internet access here – select this settings to start with or create a private network to allow connection to from!
Click on Next

- Then review the summary of your KeyVault configuration, then click Create to create the KeyVault.
Now your KeyVault is created, you can add secrets and manage access policies as needed.
You can read more about Azure Key Vaults here: Azure Key Vault Overview – Azure Key Vault | Microsoft Learn
Now its Azure DevOps time
When you have added your secrets in your new Azure Key Vault, we are ready to go to the setup here we needed in the start 🤓👨💻
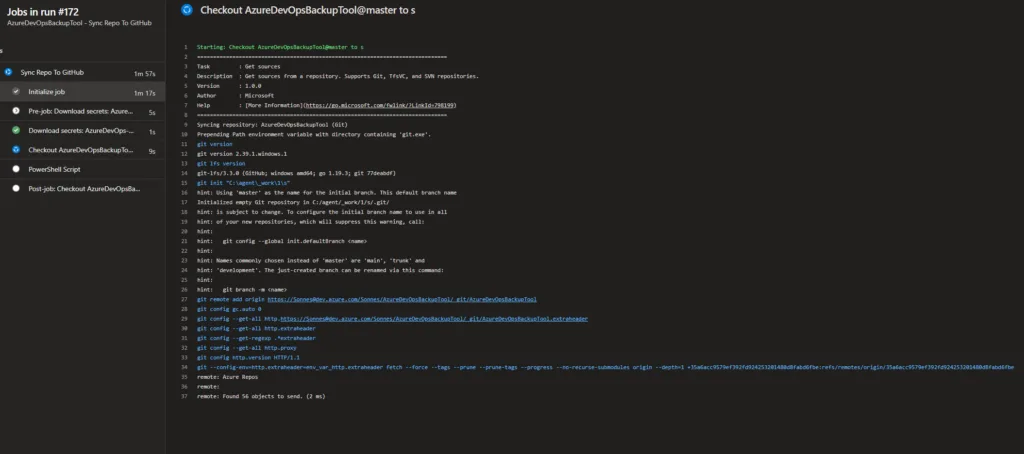
Here in this example I setup the pipeline to sync an Azure DevOps repo (Git) to GitHub (Git) when a commit it pushed to it.
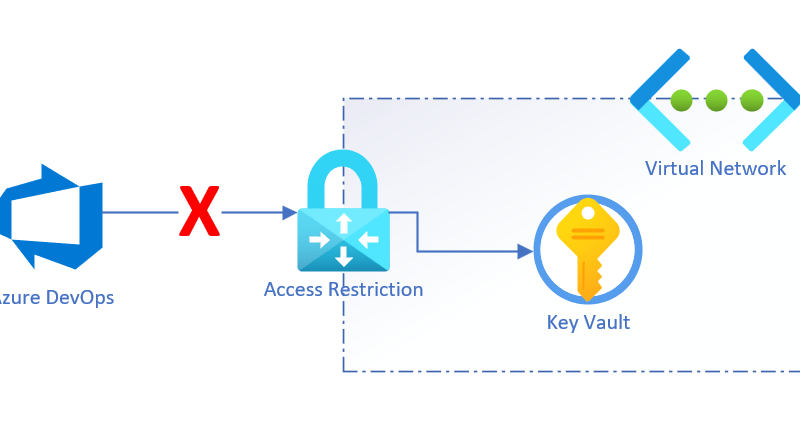
Ways to use the Azure Keyvault in your Azure DevOps pipeline
As Azure DevOps is NOT a trusted service at the list under the Azure KeyVault you can 3 things:
- Allow full public access (not recommened)
- Add some automatic to your pipelines to allow the public IP address your agent is running from (if using an Azure Hosted Agent)
- Install an Self-hosted Windows agent on a server in your local network and allow that IP to access it (or home as I did 😂🤓)
Deploy a Self-hosted Windows agent
Install the self hosted agent local
Steps to deploy a self-hosted Windows agent in Azure DevOps
Install the Azure Pipelines agent on a Windows machine. You can download the agent from the Azure Pipelines agent page in Azure DevOps.
As a one-time step, you must register the agent. Someone with permission to administer the agent queue must complete these steps. The agent will not use this person’s credentials in everyday operation, but they’re required to complete registration. Learn more about how agents communicate.
Requirements
Make sure your machine has these prerequisites:
- Operating system version
- Client OS
- Windows 7 SP1 ESU
- Windows 8.1
- Windows 10
- Server OS
- Windows Server 2012 or higher
- Client OS
- The agent software installs its own version of .NET so there is no .NET prerequisite.
- PowerShell 3.0 or higher
- Recommended – Visual Studio build tools (2015 or higher)
You should run agent setup manually the first time. After you get a feel for how agents work, or if you want to automate setting up many agents, consider using unattended config.
Hardware specs
The hardware specs for your agents will vary with your needs, team size, etc. It’s not possible to make a general recommendation that will apply to everyone. As a point of reference, the Azure DevOps team builds the hosted agents code using pipelines that utilize hosted agents. On the other hand, the bulk of the Azure DevOps code is built by 24-core server class machines running 4 self-hosted agents apiece.
Authenticate with a personal access token (PAT)
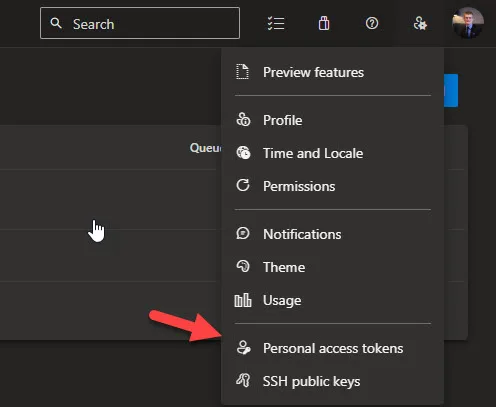
- Sign in with the user account you plan to use in your Azure DevOps organization (
https://dev.azure.com/{your_organization}).
- From your home page, open your user settings, and then select Personal access tokens.
- For the scope select Agent Pools (read, manage) and make sure all the other boxes are cleared. If it’s a deployment group agent, for the scope select Deployment group (read, manage) and make sure all the other boxes are cleared.Select Show all scopes at the bottom of the Create a new personal access token window window to see the complete list of scopes so you get that we need here.
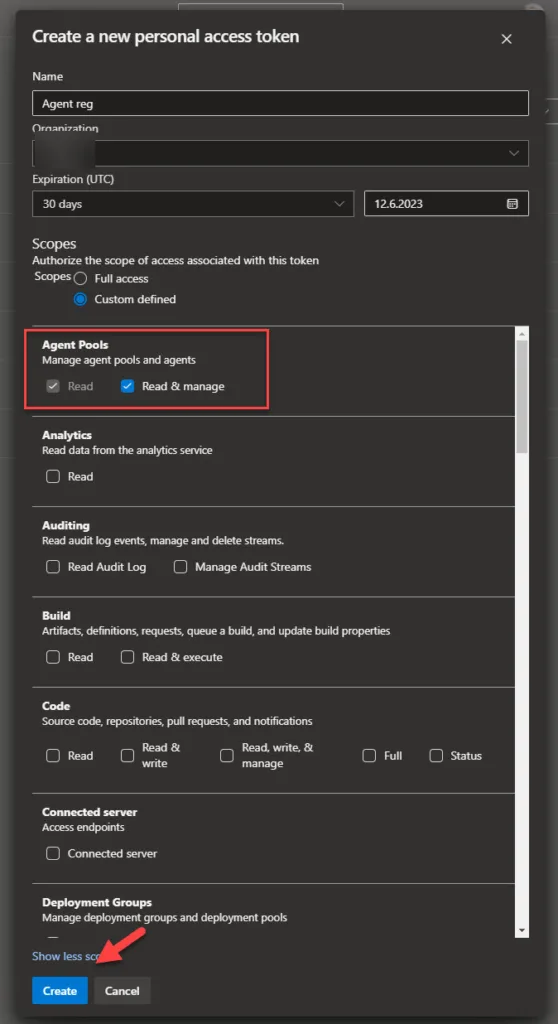
- Then click on Create
- Copy the token there will show up (it will only be visible 1 time). You’ll use this token when you configure the agent.
Download and configure the agent
- Log on to the machine using the account for which you’ve prepared permissions as needed to install the Agent (Administrator).
- In your web browser, sign in to Azure Pipelines, and navigate to the Agent pools tab
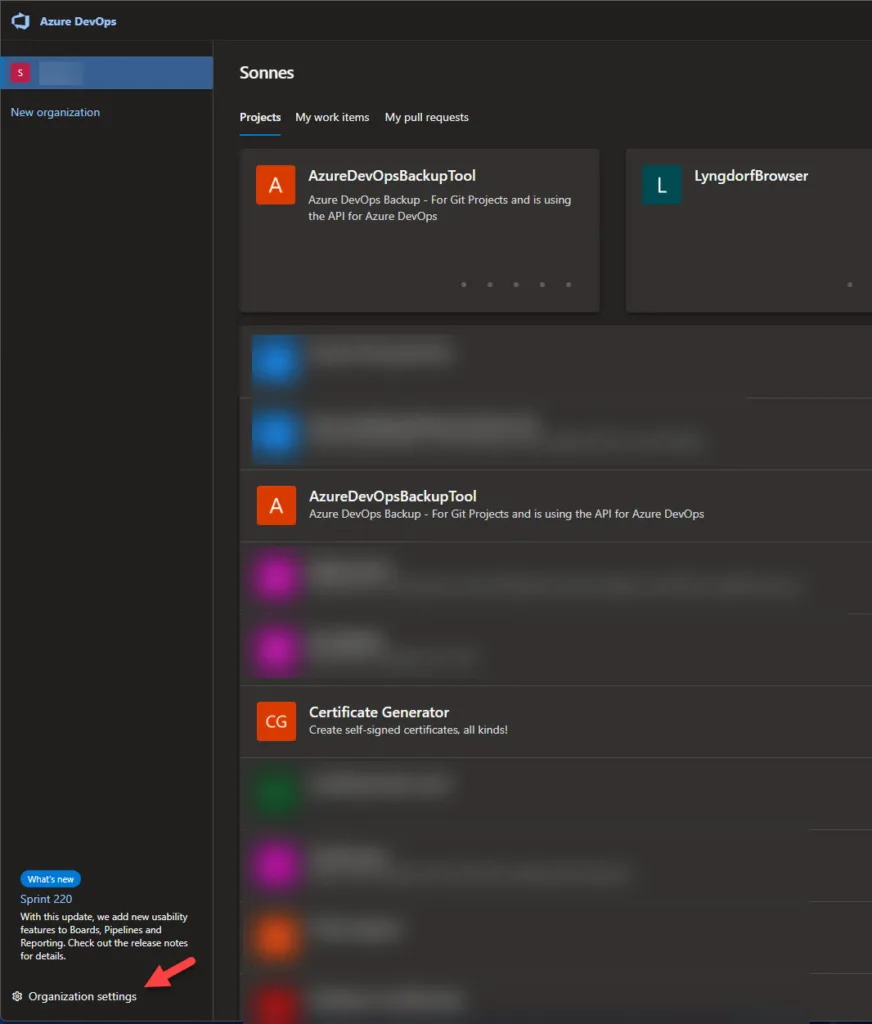
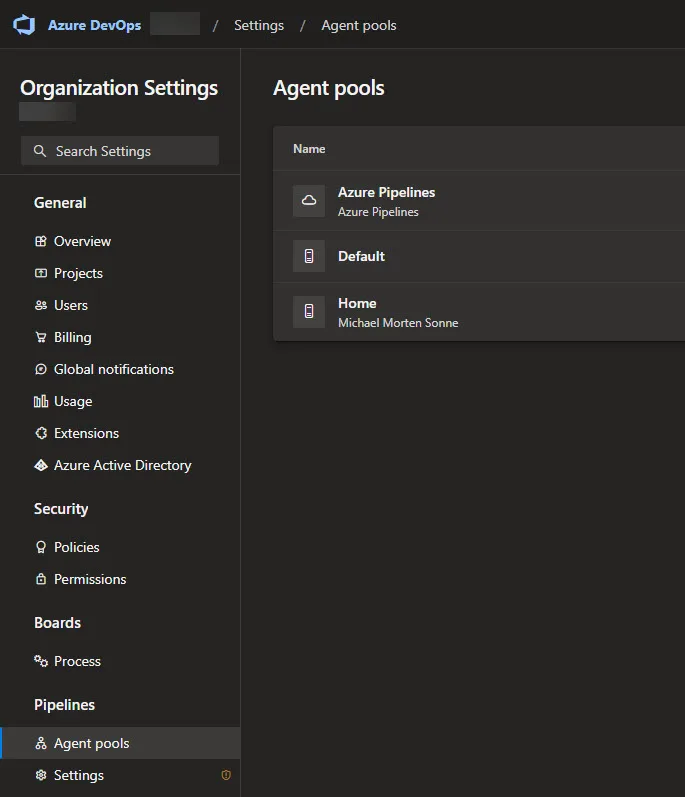
- Choose Azure DevOps and then Organization settings.
- Choose Agent pools under Pipelines.
- Select the Default pool (or create a new in top right and select the type: Self-Hosted), select the Agents tab, and choose New agent.
- On the Get the agent dialog box, choose Windows (as we use in this post).
- On the left pane, select the processor architecture of the installed Windows OS version on your machine. The x64 agent version is intended for 64-bit Windows, whereas the x86 version is intended for 32-bit Windows (I hope not you are using this 🤪).
- On the right pane, click the Download button.
The windows as this post is created:

- Follow the instructions on the page to download the agent.
- Unpack the agent into the directory of your choice. Make sure that the path to the directory contains no spaces because tools and scripts don’t always properly escape spaces. A recommended folder is C:\agents. Extracting in the download folder or other user folders may cause permission issues.
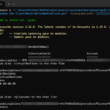
- Open a command prompt and navigate to the agent directory (e.g. C:\agent).
- Run the command config.cmd to start the agent configuration process.
- Enter your Azure DevOps organization URL and personal access token (PAT) when prompted. The PAT is used to authenticate the agent with your Azure DevOps organization under the setup.
- Follow the prompts to configure the agent name, pool, and other settings as needed.
- Once the agent is configured, run the command run.cmd to start the agent service.
- In Azure DevOps, navigate to your project and click on Project settings in the bottom left-hand corner.
- After successfully adding the agent, it should appear in the agent pool and be available for use in your pipelines.
Once you have deployed the self-hosted Windows agent, you can use it to run your pipelines on your local machine or on-premises infrastructure. This allows you to build, test, and deploy your applications using the same Azure Pipelines service you use for cloud-based builds.
Deploy an Azure Pipelines agent on Windows – Azure Pipelines | Microsoft Learn
Allow the public IP from your self hosted agent to connct to Azure KeyVault (And Azure DevOps to)
Go to the Networking setting on your Azure Key Vault created, and under Firewall add your IP address for your agents public IP under IP Address or CIDR like here:

Then click Apply to save it.
Now the agent installed on your local server can access the Azure KeyVault and getting the needed secrets to do its job in with your pipeline.
For the Azure DevOps Service itself to checks and so on is correct in the portal, remember to add the service IP´s listet here based on our Azure DevOps location: Allowed address lists and network connections – Azure DevOps | Microsoft Learn
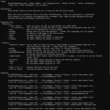
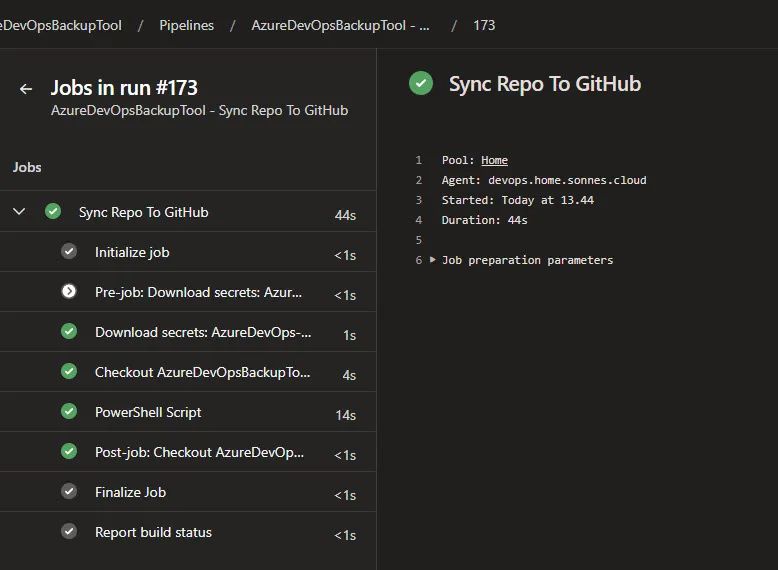
How it looks when all is good and running
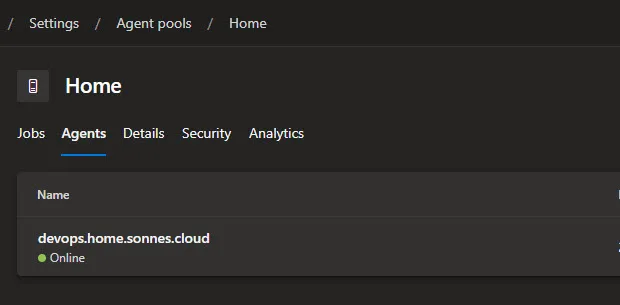
Under the Agent pools at the Project the agent is running and connected fine:
And at the jobs all it fine also, so all not works:
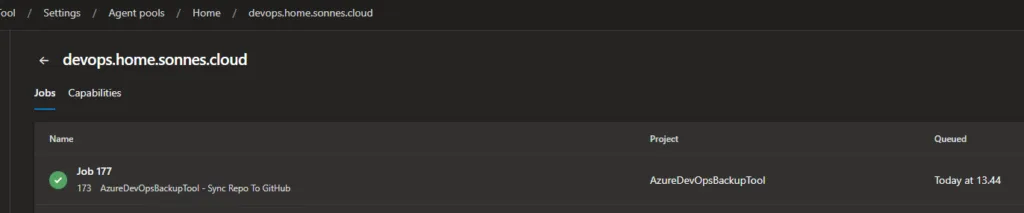
When you go to an agent job it looks like this, and you can see it was running at the agent at home!
Use the new Agent pool in your Pipelines
Let’s attach this new Agent Pool to a Pipeline and see how it works. Go-ahead and create a new pipeline with etc. an Empty Job and use the Default as the Agent Pool as shown below or edit your existing.

Under variables use the names as is it in your Azure KeyVault and you are good to go.
In some of my projects i use variable groups to share secrets over multiple pipelines in a project so i only need to manage it in one palce 😉🔐
When setup, it looks like this and when you link it in your Pipeline in your project
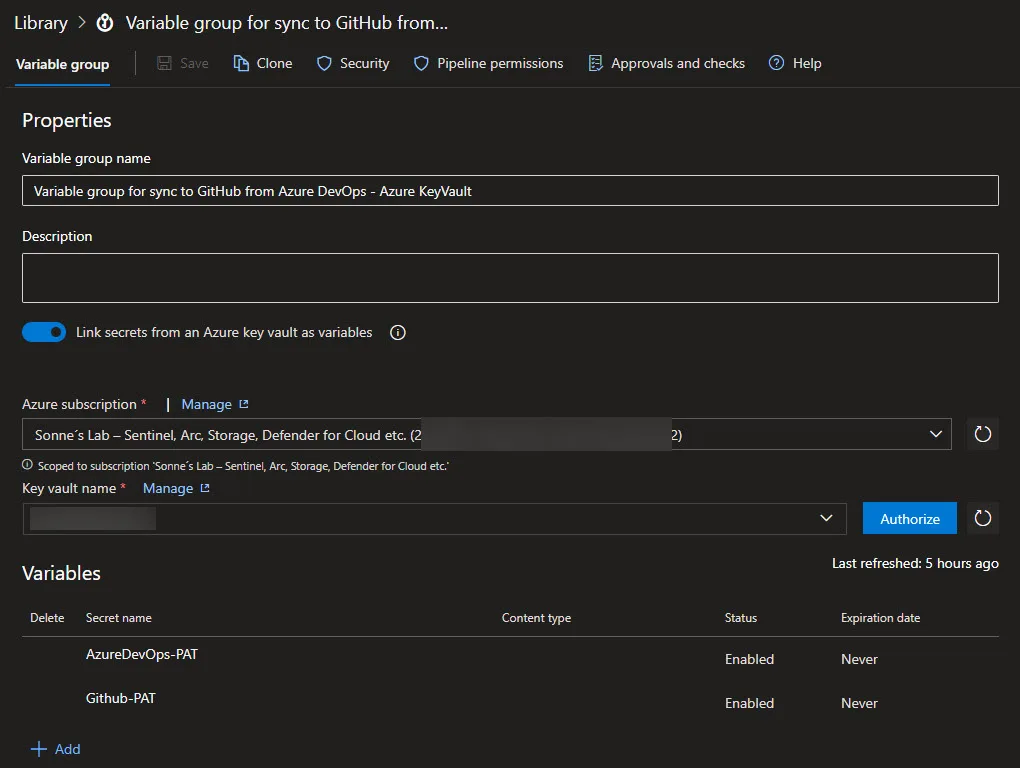
Read more about this here: Variable groups for Azure Pipelines – Azure Pipelines | Microsoft Learn
Thank you for taking the time to visit my blog. Kindly share it with others if you find it helpful for them! 😉🔐👍
Stay tuned for the new post about something cool! 🥳