

Last Updated on July 9, 2023 by Michael Morten Sonne
Table of Contents
- What is PIM for Groups?
- Requirements
- Discover the Importance of Principle of Least Privilege
- How to setup PIM for Goups
- User scenario – PIM Roles for a user not a group
- How does it work for the end-user? – approval not needed
- How does it work for the end-user? – approval needed from an administrator/manager
- Monitoring the use of roles
Secure your Azure environment with the power of the Principle of Least Privilege and Azure Privileged Identity Management (PIM). This blog post delves into the importance of the principle of least privilege (POLP) and how combining it with Azure PIM that enhances the security of your resources in Azure (but in Microsoft 365 to)
What is PIM for Groups?
PIM for Groups is part of the Azure Active Directory Privileged Identity Management. With PIM for Groups users can activate membership or ownership of an Azure AD security group or Microsoft 365 groups. These groups can be used to assign access to for example some Azure AD roles or Azure roles.
When using Azure PIM with PIM for Groups, you’re following the Microsoft best practices of ‘least privileged’ strategy.
Requirements
There are some prerequisites when starting with PIM.
- You need Global Administrator, Privileged Role Administrator or the Group Owner role
- Every user who is eligible for membership in or ownership of a privileged access group must have an Azure AD Premium P2 license
When all the above prerequisites are in-place, we can start configuring PIM for Groups.
Discover the Importance of Principle of Least Privilege
The principle of least privilege is essential for safeguarding sensitive information, systems and minimizing security breaches by granting only the minimum required privileges to users and/or administrators. By implementing this principle, organizations can lower the chance of accidental or malicious misuse of sensitive information, system access and minimize potential damage in case of a security breach. Moreover, implementing POLP enhances overall security posture, streamlines administration, and clarifies user responsibilities and capabilities! 🔐👍
You assign users the role with the least privileges necessary to perform their tasks. This practice minimizes the number of Global Administrators and instead uses specific administrator roles for certain scenarios.
What can you manage in PIM
Today, you can use PIM with:
- Azure AD roles – Sometimes referred to as directory roles, Azure AD roles include built-in and custom roles to manage Azure AD and other Microsoft 365 online services.
- Azure roles – The role-based access control (RBAC) roles in Azure that grants access to management groups, subscriptions, resource groups, and resources.
- PIM for Groups – To set up just-in-time access to member and owner role of an Azure AD security group. PIM for Groups not only gives you an alternative way to set up PIM for Azure AD roles and Azure roles, but also allows you to set up PIM for other permissions across Microsoft online services like Intune, Azure Key Vaults, and Azure Information Protection.
You can assign the following to these roles or groups:
- Users– To get just-in-time access to Azure AD roles, Azure roles, and PIM for Groups.
- Groups– Anyone in a group to get just-in-time access to Azure AD roles and Azure roles. For Azure AD roles, the group must be a newly created cloud group that’s marked as assignable to a role while for Azure roles, the group can be any Azure AD security group. We do not recommend assigning/nesting a group to a PIM for Groups.
Experience the benefits of using Azure Privileged Identity Management (PIM)
By utilizing Azure PIM with the principle of least privilege, organizations can ensure secure access to sensitive resources in Microsoft Azure and Microsoft 365. Azure PIM implements POLP by controlling user privilege elevation and limiting it to the minimum necessary to perform job functions, reducing the risk of security breaches and unauthorized access to sensitive resources. Additionally, Azure PIM offers centralized management, clear accountability for sensitive resource access, and auditing and reporting capabilities to detect and prevent privileged access abuse.
Are you ready to strengthen your security posture and protect your Azure/Microsoft environment today? Read here to learn how to set up Azure PIM and the principle of least privilege for optimal results!
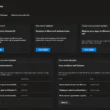
Configure PIM settings for Azure AD roles
Privileged Azure AD role that your organization uses.
The following table shows example settings:
| Role | Require MFA | Notification | Incident ticket | Require approval | Approver | Activation duration | Perm admin |
| Global Administrator | ✔️ | ✔️ | ✔️ | ✔️ | Other Global Administrator | 1 Hour | Emergency access accounts |
| Exchange Admin | ✔️ | ✔️ | ✔️ | ❌ | None | 2 Hour | None |
| Helpdesk Admin | ❌ | ❌ | ✔️ | ❌ | None | 8 Hour | None |
Configure PIM settings for Azure Resource roles
Azure Resource roles that you’ve planned to protect with PIM.
The following table shows example settings:
| Role | Require MFA | Notification | Require approval | Approver | Activation duration | Active admin | Active expiration | Eligible expiration |
|---|---|---|---|---|---|---|---|---|
| Owner of critical subscriptions | ✔️ | ✔️ | ✔️ | Other owners of the subscription | 1 Hour | None | n/a | 3 months |
| User Access Administrator of less critical subscriptions | ✔️ | ✔️ | ❌ | None | 1 Hour | None | n/a | 3 months |
How to setup PIM for Goups
- Open the Azure Portal – Microsoft Azure
- Navigate to Azure Active Directory > Groups (tip here: direct link)
- Select New group
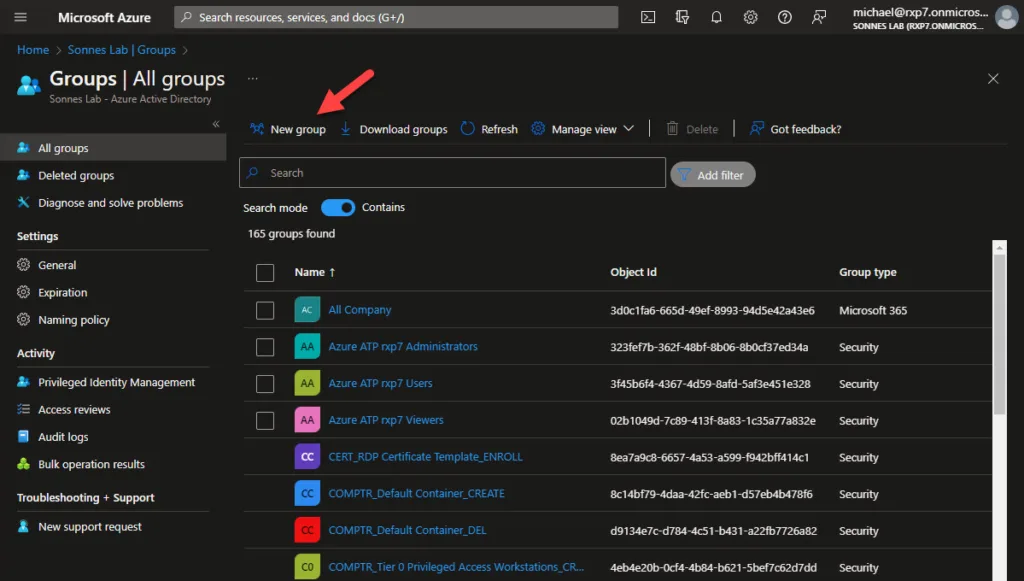
- Choose the group type Security or Microsoft 365 (both are supported 🥳)
- Give the new group a name and description
- Set the Azure AD roles can be assigned to the group to enabled (default No)
(Remember that when set roles can be assigned, dynamic user and device memberships is NOT supported and will revert to Assigned type)
When creating a group where Azure AD Roles can be assigned, the setting for this cannot be changed later – read more here: Use Azure AD groups to manage role assignments – Microsoft Entra | Microsoft Learn

For now we don’t select any roles, we’re going to configure this later
- Select Create
- Search for the new created group and open the properties

- Navigate to Privileged Identity Management (not more Privileged access (preview)! 🥳) and select Enable Azure AD PIM for this group
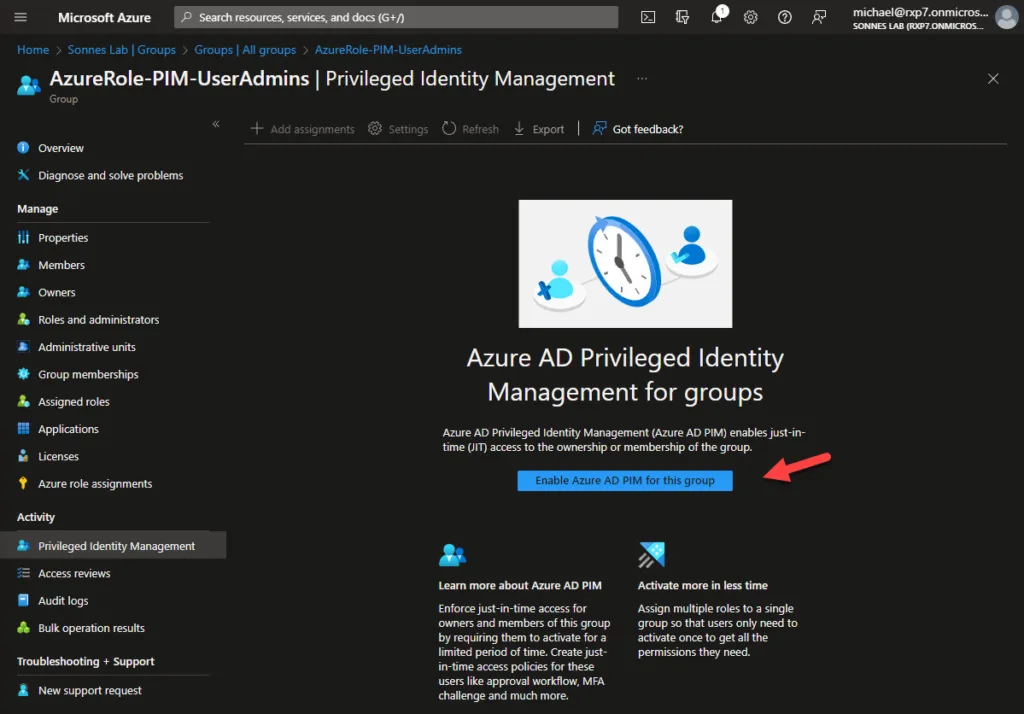
After enabling Azure PIM for the Group, we need to assign the Roles to this group we need
- Navigate to Assigned Roles and select Add Assignment

Select the role or multiple roles you wil assign the this group 😉

On the Settings tab, you can select the assignment. Is this example we select Eligible. You can also choose to let the eligible assignment expire after a period of time, but for now we select Permanently eligible.
- Active assignments – The configured roles are active for the members in this group, without using PIM
- Eligible assignments – members of this group can activate this role using PIM for Groups

- Then click on Assign
Now you can see the new role under the collum Eligible assignments
The next step is to create a Eligible Assignment. Navigate to Privileged Identity Management and select Add Assignment
- On the Select role choose Member – select the user in your Azure AD who needs this eligible permission

- On the Setting choose Eligible – here you can setup an expiry date the role assignment ends for the selected user.
- Then click on Assign
Settings that are possible for PIM for Groups
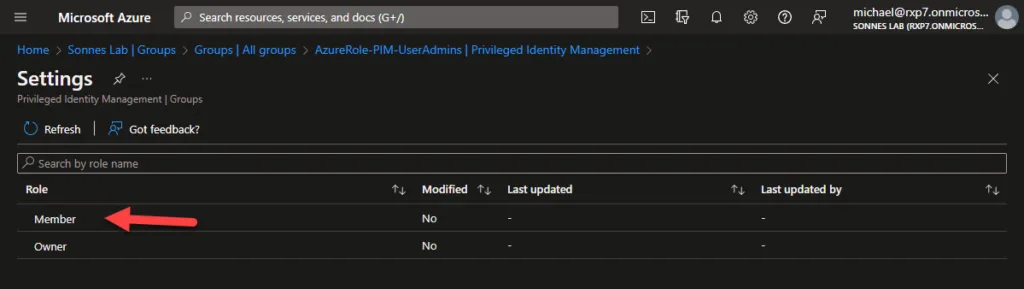
- Find the right group, in this example the previously created group ‘AzureRole-PIM-UserAdmins’. Select Privileged Identity Management, then Settings.

- Select Member and configure the desired settings here.
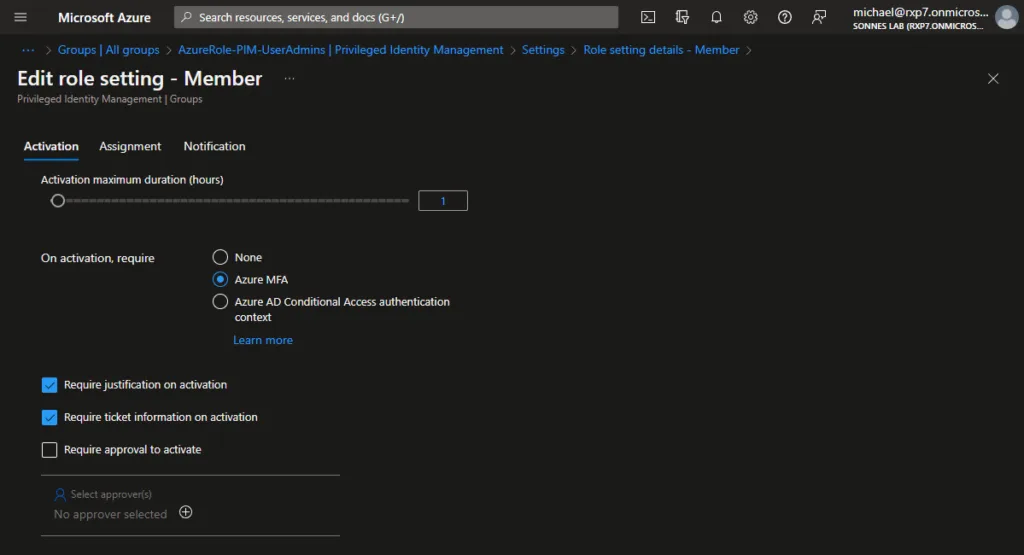
The configuration is divided into 2 parts (as there is a bit you can setup 🤤)
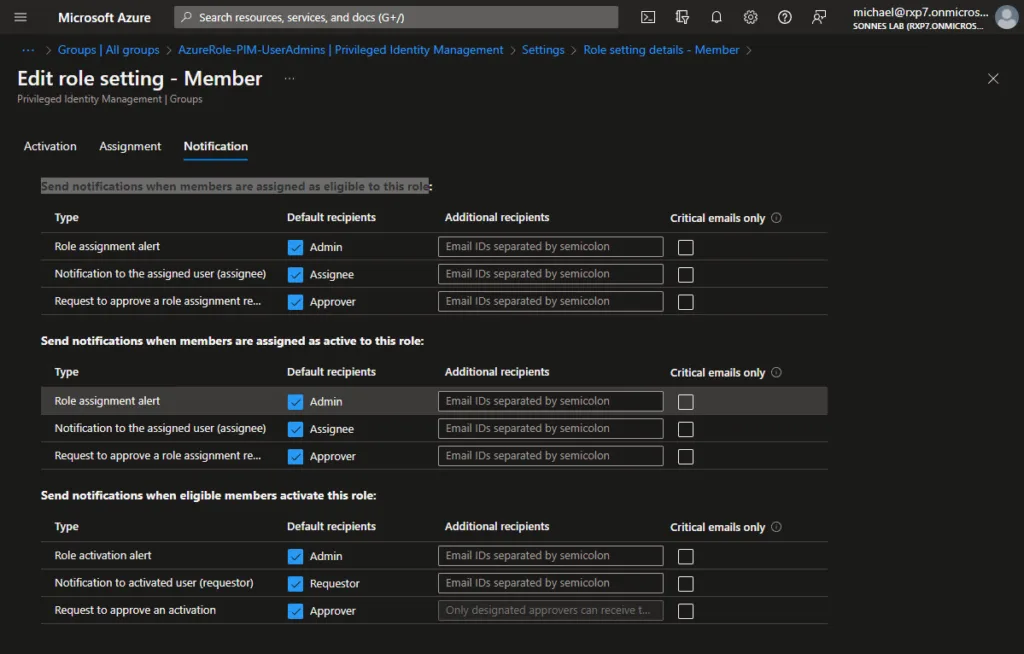
The upper part of the properties is for activation and the lower part for logging and auditing. To change settings, select Edit.

Remember that it is important to think carefully about how long a role may/can be activated. In this example, we opted for the default 8 hours. As mentioned, Azure MFA is required.
I strongly recommended to have a request for approval sent to a person or several people within the organization. Think, for example, of a security officer or a leder in. Only if approval is given, the activation will be carried out. This is especially so for roles that are quite privileged!
Daniel Chronlund have an awesome .csv file with some recommendations based on role impact here: Automatic Azure AD PIM Role Micromanagement Based on Role Impact
There is some new stuff in Azure AD Conditional Access – authentication context, more on this later in a new blog.
- It is a choice to have a short description and ticket information entered by the users during activation. Later in this blog post you can see the result of this 😉

You can choose one of these eligible assignment duration options.
| Setting | Description |
|---|---|
| Allow permanent eligible assignment | Resource administrators can assign permanent eligible assignments. |
| Expire eligible assignment after | Resource administrators can require that all eligible assignments have a specified start and end date. |
You can also choose one of these active assignment duration options.
| Setting | Description |
|---|---|
| Allow permanent active assignment | Resource administrators can assign permanent active assignments. |
| Expire active assignment after | Resource administrators can require that all active assignments have a specified start and end date. |
There is a nice post here regarding Working with rules in privileged identity management (PIM) – Microsoft Graph | Microsoft Learn – check it out too!
For now, the configuration is ready and you are good to go – click Update!
User scenario – PIM Roles for a user not a group
In this scenario, we have John, a senior helpdesk administrator. Typically, John is able to perform his job duties with the helpdesk administrator role. However, in some instances, he requires Global Administrator rights. As he does not need these rights regularly, he does not have standard global administrator privileges. We are now setting up Azure PIM so John can request the necessary permissions himself, as they are eligible for him.
Azure AD Premium P2 license is required to use Azure PIM
How to do will you think right?
- Open https://portal.azure.com
- Open Azure AD Privileged Identity Management

You are now at the Azure PIM dashboard, the centralized management system for securing access to your Azure resources. On the left-side menu, you can manage and configure various aspects of your Azure PIM implementation, including roles, requests, configurations, and granting/revoking access.
- Go on the left-side under Manage to Azure AD roles
- Select etc. the Global Administrator role, click Add assignments and select the relevant user(s). In my case, Adele Vance (my lab)
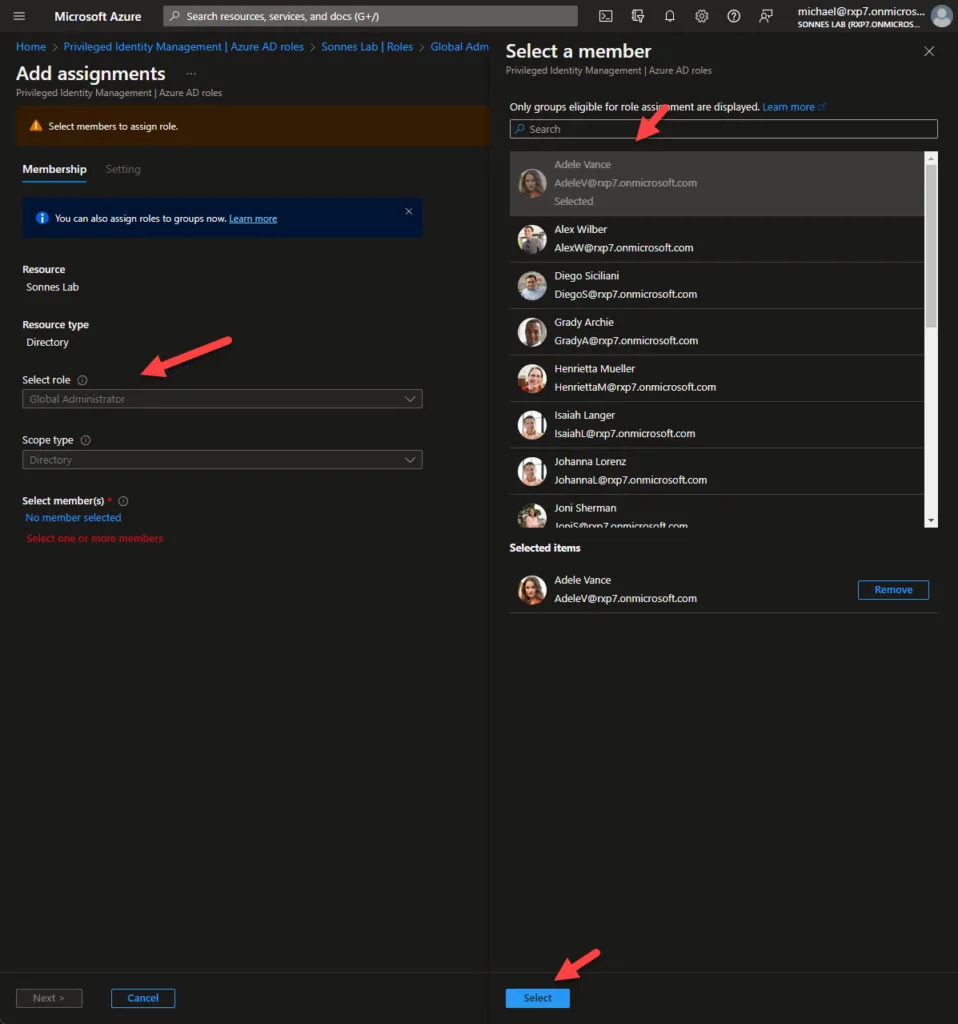
The following screen displays various options for role assignment and eligibility. You can assign a role on a permanent or temporary basis. In this instance, Adele is permanently eligible for the role. Click Assign.

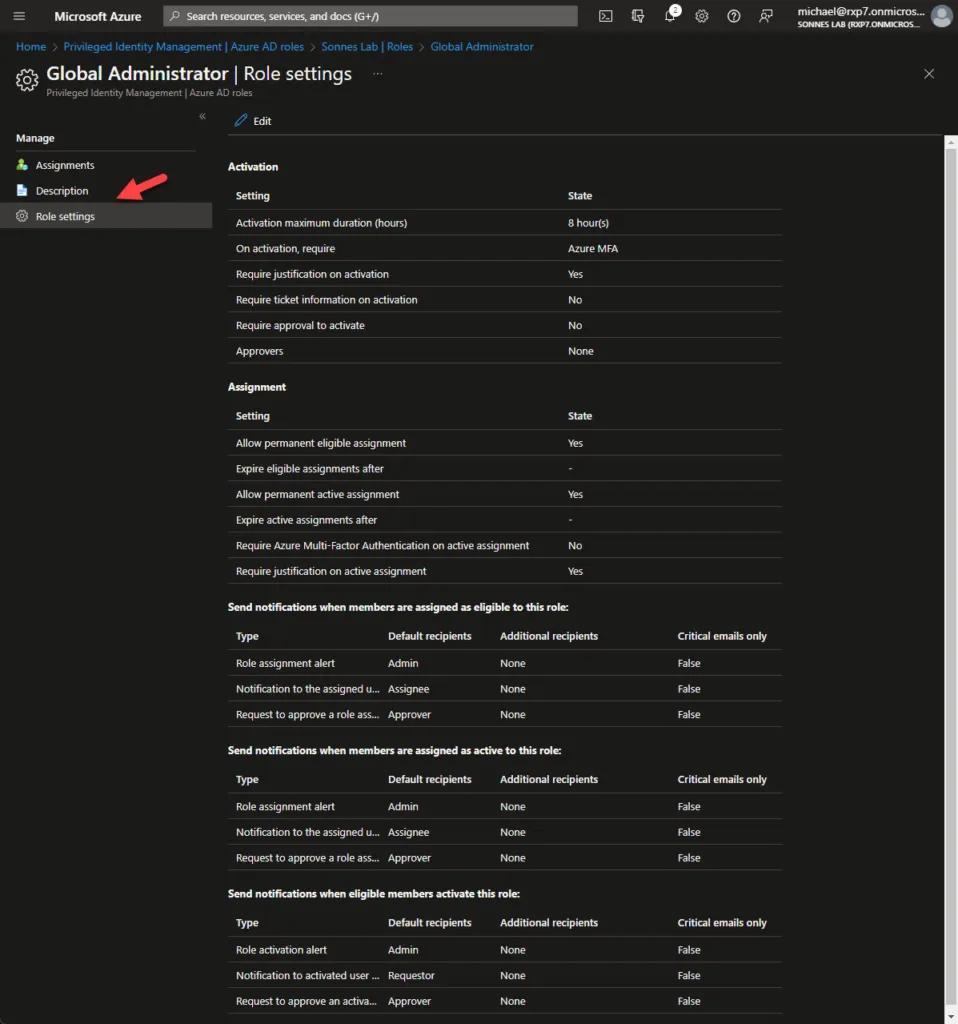
As you can see, the user Adele Vance is now eligible for the Global Administrator role. Please click on the Role Settings on the left-side of the screen to go to the next step.
Under Role Settings to the left, you’ll find various options for managing assigned permissions. You can set the duration for which the rights are granted and they will automatically be revoked after that it needed. You can also gather additional information for logging, such as a ticket number, and determine if approval is needed or if it’s an automatic process. You can also set up notifications for specific users when the role is requested.
How does it work for the end-user? – approval not needed
Let’s now test it out from the user side. Open etc. a new incognito window, log in as etc. from my lab Adele Vance on https://portal.azure.com and open the menu Azure AD Privileged Identity Management
- On the left-side for My Roles and click on the right-side for Activate
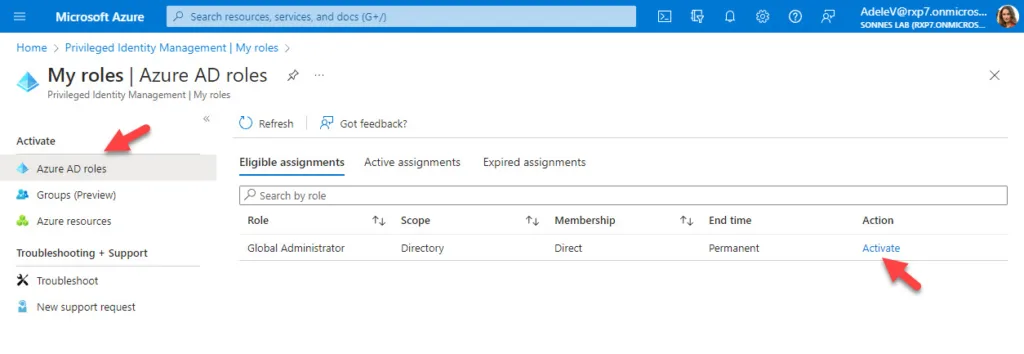
As you can see, additional verification is required. Adele needs to identify with Multi Factor Authentication (MFA)

After approving MFA Adele is able to fill in the form to activate the permissions before it will be assigned to she in the background. If all steps have been completed successfully, the browser will be automatically refreshed and PIM will be active.
(The policy can be set, so etc. a case number is needed and need for approval to activate)

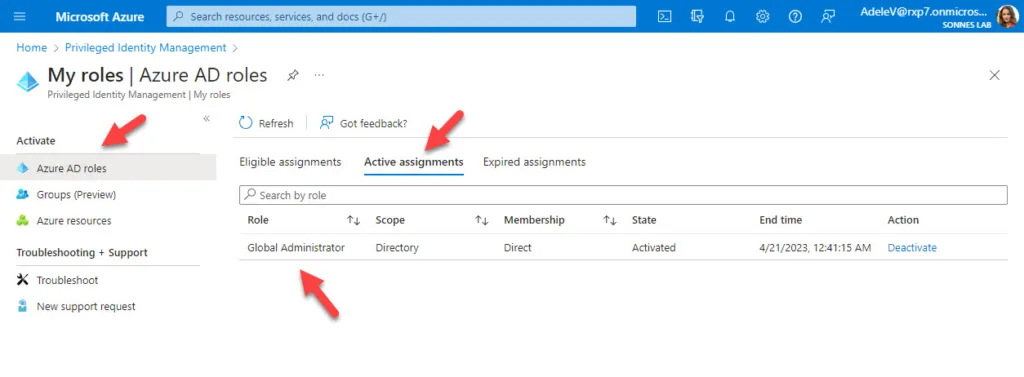
- The Global Administrator role is now activated

Microsoft has recently made the exciting announcement that Privileged Identity Management can now be extended to groups as well (Edit: not in preview anymore as July 2023 – see link in the buttom of the page)
How does it work for the end-user? – approval needed from an administrator/manager
Now lets take a look on the approval a request flow when a role need a administrator/manager approval.
Let’s now test it this senario out from the user side. Open etc. a new incognito window, log in as etc. from my lab Adele Vance on https://portal.azure.com and open the menu Azure AD Privileged Identity Management
- On the left-side for My Roles and click on the right-side for Activate
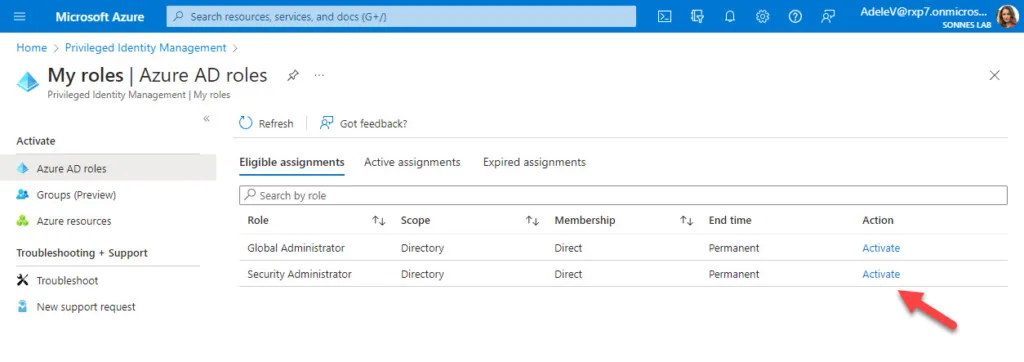
As you can see, additional verification is not required now as we before had identifyed us with Multi Factor Authentication (MFA) and running in the same session/state:

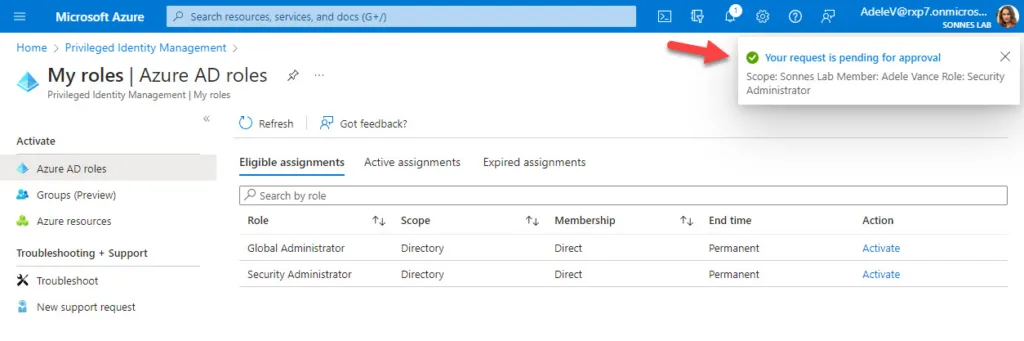
- The Security Administrator role is now send to approval
Now from administrator or approver side, you can now to go to the menu Pending requests where you see a list of requests for roles from all users there is:
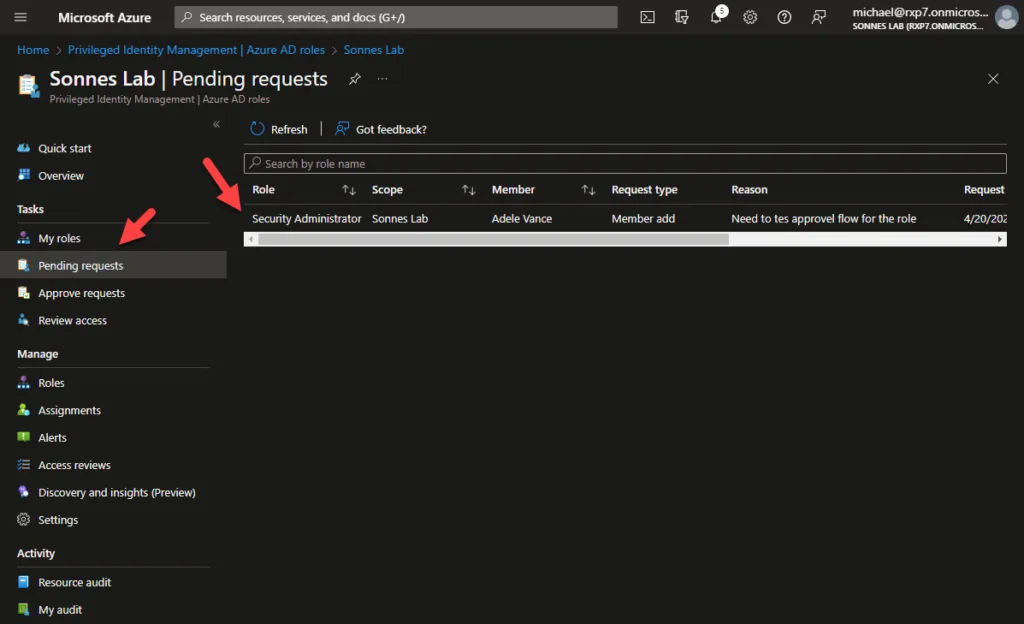
To approw requests from administrator or approver side, you can now to go to the menu Approve requests where you see a list of requests for roles from all users there is to approw or deny:

Now the administrator or approver need to fill in there justification for approval or deny the of the role assignment to the user:

At the user side, its getting an e-mail there confirm the role assignment is reviewed by an administrator or approver and is now active to the user not need to wait more to do the work there is needed:

The Security Administrator role is now activated for Adele when she looking at Active assignments under My roles > Azure AD roles:
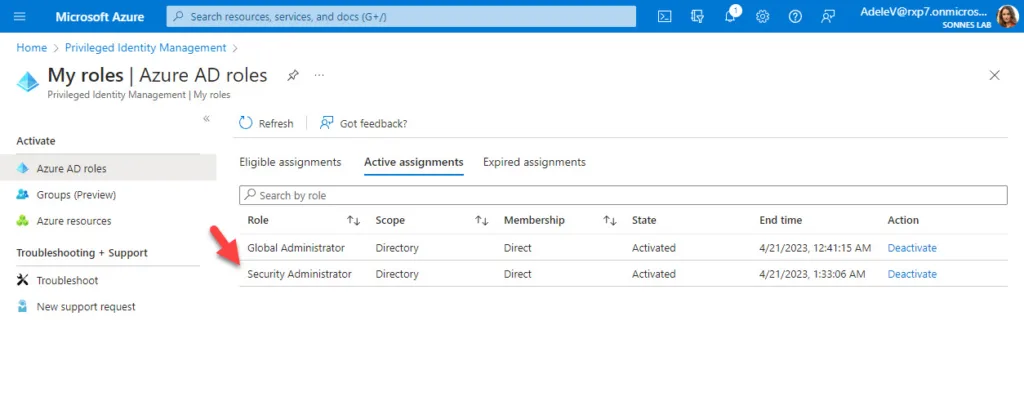
She can now do the work needed to do, so the security policyes can be checked/setup for the companyes need in a secure way 🔐👍
If you are finished performing work earlier then expected, the PIM activation can be deactivated manually. This can be done by selecting Deactivate 😉
Monitoring the use of roles
Now let’s take a look at monitoring and logging.
- Navigate to the left-side of the screen in Azure AD Privileged Identity Management for Audit History


You can see a lot more at the documantation at Microsoft´s website here: Privileged Identity Management documentation – Microsoft Entra | Microsoft Learn
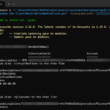
Edit:
As of July – some updates is done, etc. is PIM for Groups now GA!
Check out here: Microsoft Entra new feature and change announcements – Microsoft Community Hub
Thank you for taking the time to visit my blog. Kindly share it with others if you find it helpful for them! 😉🔐👍
Stay tuned for the new post about something cool! 🥳

