
Last Updated on February 19, 2024 by Michael Morten Sonne
Intoduction
Yes – now we can see information about WSL instances running on a Windows host!
Sorry for the delay of the post, but had not the time before now… 😂
Are you looking to enhance the security of your Windows Subsystem for Linux (WSL) 2 environment? Microsoft Defender for Endpoint (or now Defender XDR..) offers a robust solution by providing visibility into WSL containers through its dedicated plug-in.
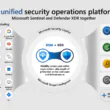
Microsoft Defender for Endpoint is an enterprise endpoint security platform designed to help enterprise networks prevent, detect, investigate, and respond to advanced threats. Defender for Endpoint for Windows Subsystem for Linux 2 (WSL) enables Defender for Endpoint to provide more visibility into all running WSL containers, by plugging into the isolated subsystem! 🤪
This was not possibel until now (I have tested this in Private Preview too), and this is a huge step in the right direction here, as WSL was missing from the begenning here! 😵🤪
Overview
The Windows Subsystem for Linux (WSL) 2 introduces seamless integration between Linux and Windows while leveraging virtualization technology for isolation. The Microsoft Defender for Endpoint plug-in enables better visibility into running WSL containers, enhancing security within the subsystem.
The Windows Subsystem for Linux lets developers and IT Pros the possibilities to run a GNU/Linux environment including most welknown command-line tools, utilities, and applications directly on your Windows “host”, unmodified, without the overhead of a traditional virtual machine or dual boot setup as in the good old days 😂
Version 2 of this subsystem leverages virtualization/containerization technology included in modern Windows operating systems to provide seamless integration and performance supporting the developer experience or what you doing.
One particular aspect of this technology is that it effectively isolates Linux from Windows – which delivers new challenges from a security perspective due to lack of visibility and protection capabilities. The Microsoft Defender for Endpoint (MDE) add-in for WSL is intended to provide visibility into file system and network activity inside running WSL2 containers – and yes, it´s welcome!
Known Issues and limitations
As this post is written
Before diving into the installation and so, it’s crucial to acknowledge and understand a few limitations:
- Manual Updates: The plug-in doesn’t auto-update (for now). Users must manually apply the new MSI package when available or continue using the MSI package method.
- Visibility Delay: Short-lived WSL container instances might not immediately appear in the Defender portal. It can take up to 30 minutes for WSL 2 instances to fully onboard!
- Proxy Configuration: Users employing proxies in their environment need to ensure proper configuration for the plug-in – else no data is send to the portal!
- Custom Kernel: Using a custom kernel with the plug-in is not supported and may result in errors. When you attempt to launch WSL with the plugin installed, you will encounter the error A fatal error was returned by plugin ‘DefenderforEndpointPlug-in’. Error message: ‘Custom Kernel/Configuration not supported.’ – we can hope this support comes, but not for now!
Software Prerequisites
To begin the installation, ensure the following prerequisites are met before trying to use this add-in:
- WSL version 2.0.7 or later running with at least one active distro.
- Windows 10, version 2004 and higher (build 19041 and higher) or Windows 11.
- Defender for Endpoint onboarded and operational on the Windows host OS.
Installation
Here’s a step-by-step guide for installing the Defender for Endpoint plug-in for WSL – but it´s easy and fast so you can only be to slow! 🤪😂
Install WSL
- Open Terminal or Command Prompt. (In Windows, go to Start > Command Prompt. or, right-click the start button and then select Terminal)
- Ensure that WSL is installed or not: Run wsl —install if WSL isn’t installed yet.
Confirm WSL Status
- Using Terminal or Command Prompt, Run wsl —update to ensure you’re on the latest version.
Install the plug-in for WSL
After WSL is running and fully up to date, follow these steps to install the plug-in:
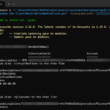
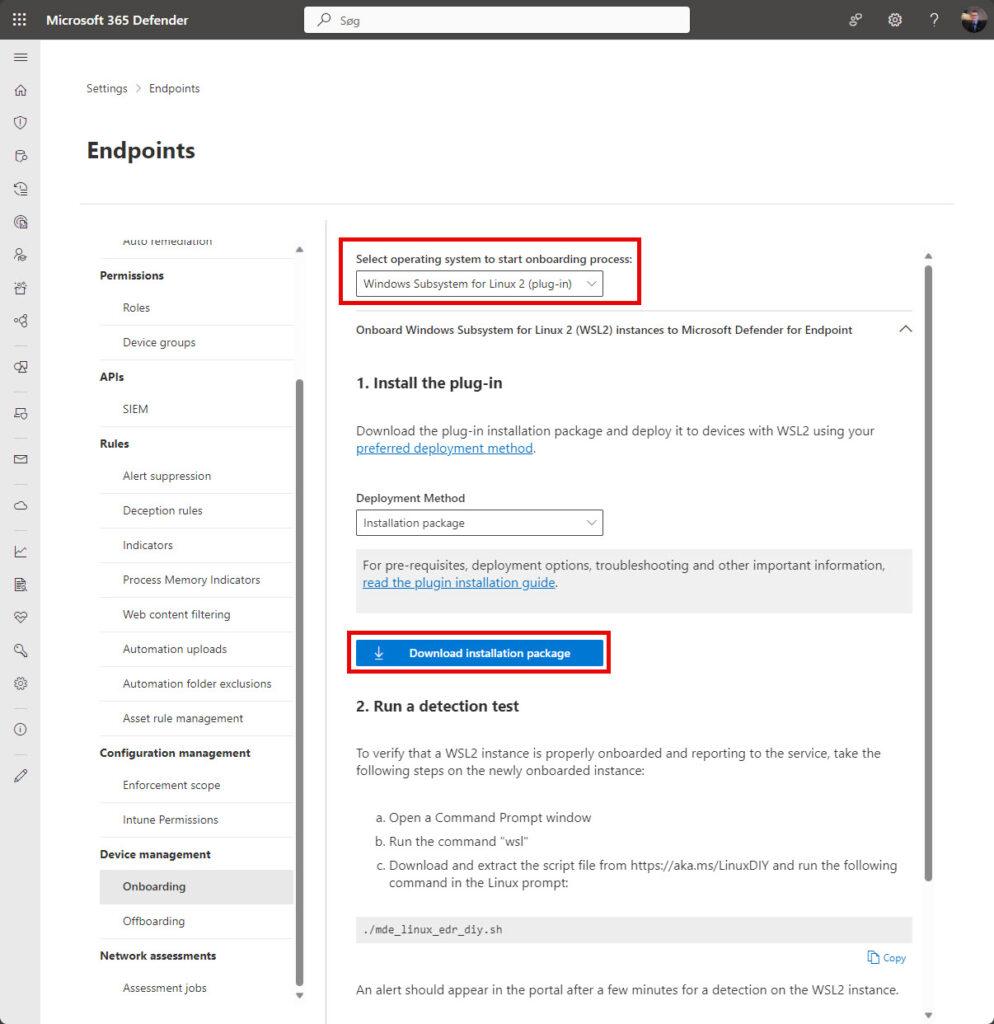
- Download and Install the MSI file downloaded from the onboarding section in the Microsoft Defender portal (Settings > Endpoints > Onboarding > Windows Subsystem for Linux 2 (plug-in)) and follow the installation steps (none, auto install 🤪 when granted admin permissions).
The isntaller is around 100 Mb in size, so its not a big one – and take not your hole internet speed, so do it now! 😎
After installation of the MSI installer (can be deplyed with Intune too – I will update the post here ASAP with this too).
Detection test for the MDE Add-in
Run a detection test to verify that a WSL2 instance is properly onboarded and reporting to the Microosft Defender service via the following steps on the newly onboarded instance:
- Open a Command Prompt
- Run the command wsl to get into WSL
- Download and extract the script file from https://aka.ms/LinuxDIY and run the following command in the Linux prompt:
- ./mde_linux_edr_diy.sh
- An alert should appear in the portal after a few minutes for a detection on the WSL2 instance – it not, check your work or try again! – worked here in the Private Preview 🤪
Components there is installed and is usefull:
DefenderforEndpointPlug-in.dll. This DLL is the library there do all the work for Defender for Endpoint to work within WSL. You can find it at C:\Program Files\Microsoft Defender for Endpoint plug-in for WSL\plug-in.
healthcheck.exe. This program checks the health status of Defender for Endpoint and enables you to see the installed versions of WSL, plug-in, and Defender for Endpoint. You can find it at C:\Program Files\Microsoft Defender for Endpoint plug-in for WSL\tools.
Installation Validation checks
After update or installation, wait at least five minutes for the plug-in to fully initialize and write log output.
To check the local health, do this:
- Open Terminal, PowerShelll or Command Prompt. (In Windows, go to Start > Command Prompt. Or, right-click the start button and then select Terminal)
- Run the command: cd “C:\Program Files\Microsoft Defender for Endpoint plug-in for WSL\tools”
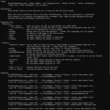
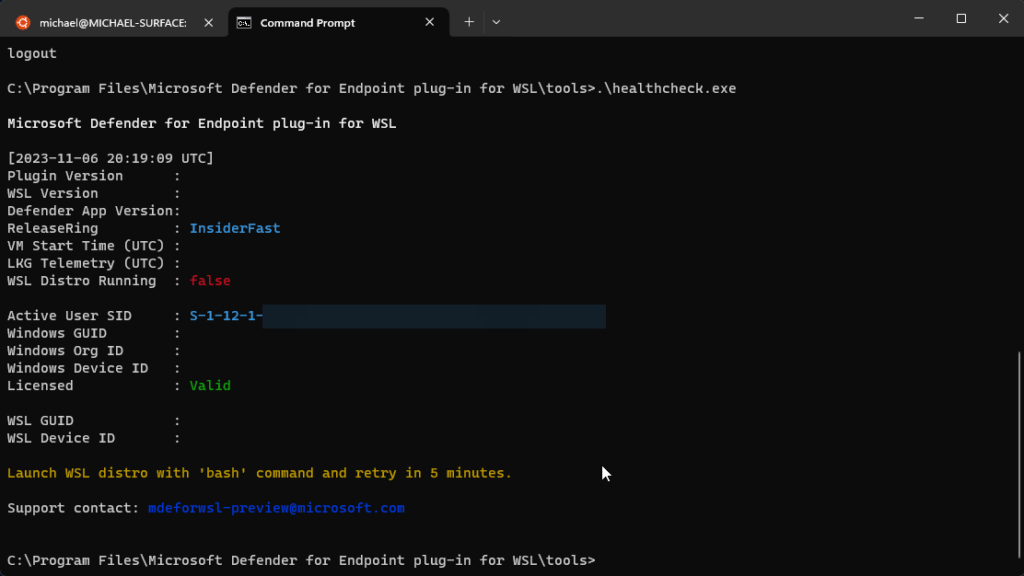
- Run the command .\healthcheck.exe – the output should look like this:
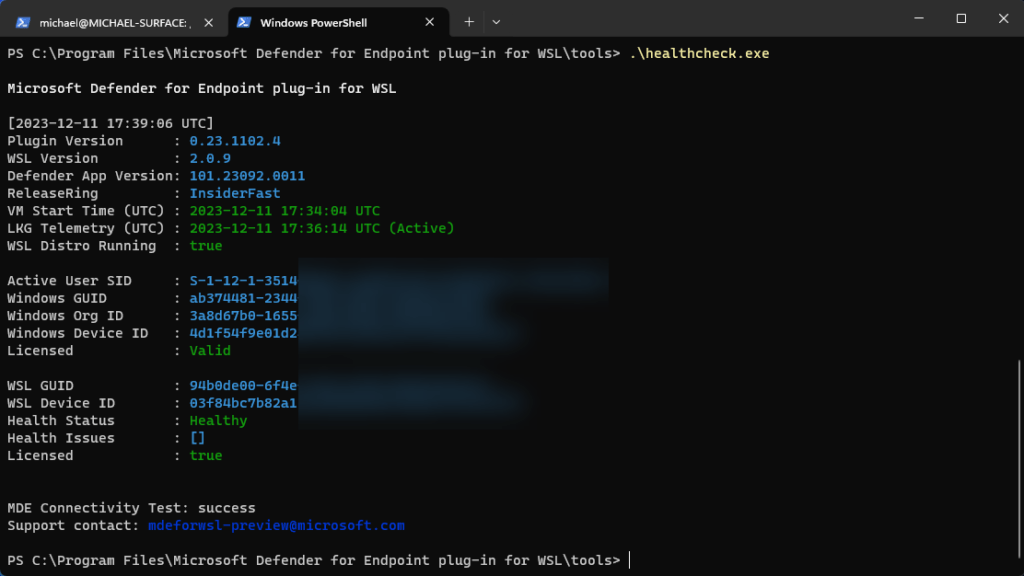
Review the details of Defender and WSL and make sure they match or is highter than the following:
- Defender Plug-in Version: 0.23.1102.4
- WSL Version: 2.0.7.0 or later
- WSL Defender Version: 101.23092.0011
- WSL Defender Health: Healthy
If all looks like this, you are good to go with your WSL instllation! 🙌😎
The rest is just information about the host, tenant it´s onboarded in and so on.
After installation or updates, perform the following validation steps.
Connectivity test for Defender Running in WSL
Test Defender’s internet connectivity within WSL using registry key configurations and the healthcheck.exe tool too.
- Open Registry Editor as an administrator (normal users can´t this).
- Create a registry key with the following details:
- Name: ConnectivityTest
- Type: REG_DWORD
- Value: Number of seconds plug-in must wait before running test. (Recommended: 60 seconds)
- Path: Computer\HKEY_LOCAL_MACHINE\SOFTWARE\Microsoft\Windows\CurrentVersion\Lxss\Plugins\DefenderPlug-in
- Once the registry is set, restart wsl using the following steps:
- Open Command Prompt and run wsl –shutdown.
- Run the command wsl to start it up again.
- Wait about 5 minutes and then run healthcheck.exe (located at C:\Program Files\Microsoft Defender for Endpoint plug-in for WSL\tools for the results of the connectivity test) in your console.
If ass it successful, the connectivity test shows success 😎
Verifying functionality in de Security Portal
Check the Defender portal to ensure all WSL instances are visible and monitored by Defender for Endpoint. You can etc. use the timeline view for observing activity and detections in almost live view.
- After installing the plug-in, the subsystem for Linux and all its running containers are onboarded to the Microsoft Defender portal,
- Sign into the Microsoft Defender portal, and open the Devices view.
- Filter the list of devices using the tag WSL2 (yes, you need to do it manualy, as there is de default tag/view for it).
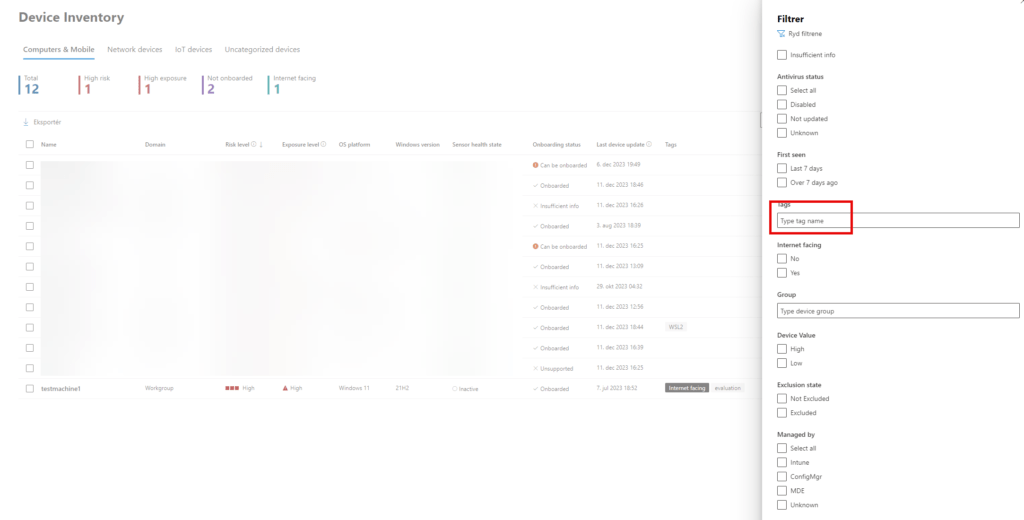
These instances represent all distributions running inside WSL on a given host. The hostname of a device matches that of the Windows host – and the WSL is (for me) with big letters of the same name of the host name (there is in small letters for the name).
- Open the device page. In the Overview pane here, there is a link to where the device is hosted. The link enables you to understand that the device is running on a Windows host. You can then pivot to the host for further investigation and/or response.
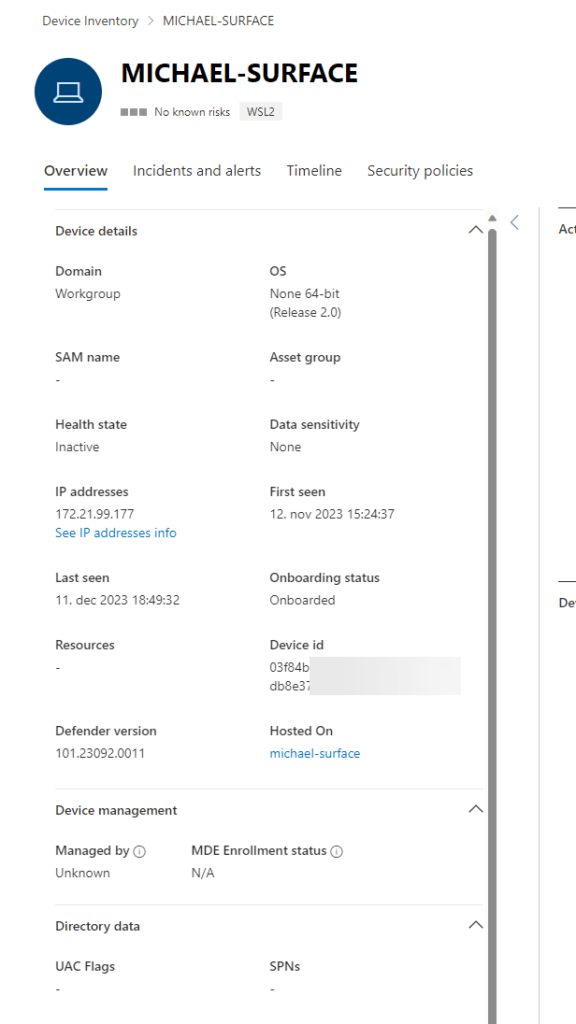
The timeline is populated similar to Defender for Endpoint on Linux and Windows with events from inside the subsystem (files, process, network and so on). You can observe activity and detections in the timeline view. Alerts and incidents are generated as appropriate as well – so nice! 😍😎
And just to remember – the actions/options for the WSL is not so much as on the Windows host, as you only have this options for the WSL instance:

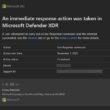
As all this actions is possibel on the Windows host to oerform – etc. isolate host:
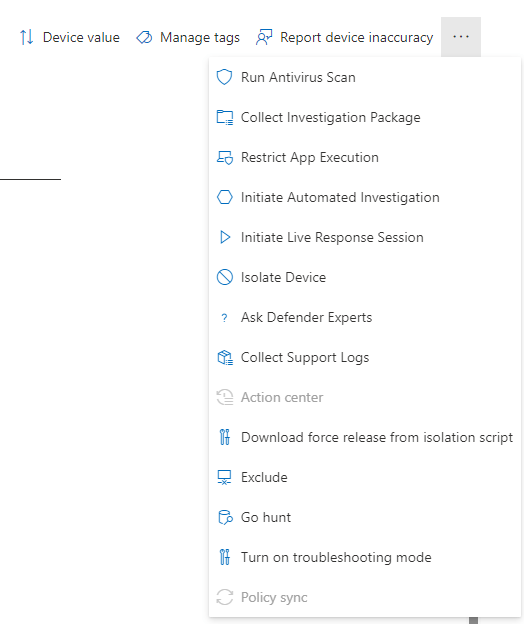
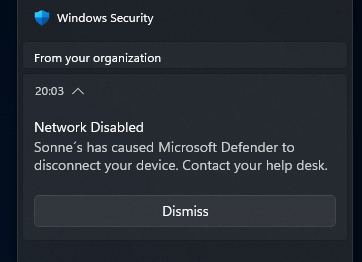
Isolate host – will it isolate the WSL too?
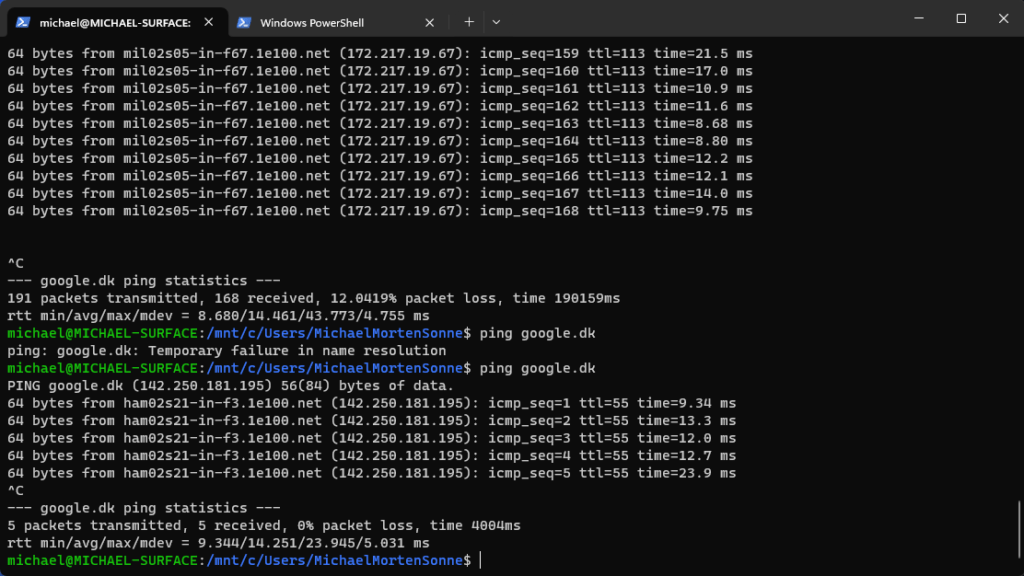
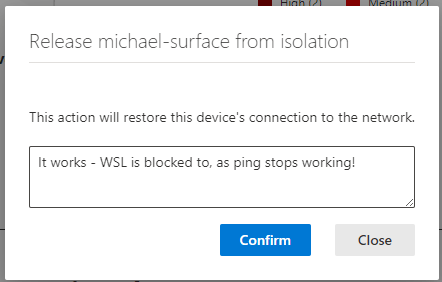
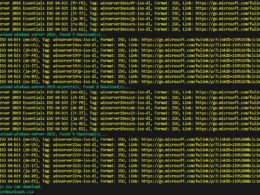
Yes it will, I have tested that – and this is super cool, as before when you isolated the Windows host – the internet connectivity for the WSL still worked and you could bypass it on the Windows host if you has the WSL running as a proxy – cool! 😎😍🤩
Then the result for my ping test was like this for etc. google.com – and when I unisolate the device again, ping worked again like before! 😎
Testing the Plug-in more
Perform a test using a provided script to trigger an alert within the Defender portal – see over there in the post for that – else: run some stuff you know generating an alert 🤪😂
Advanced Hunting
Explore advanced queries using Kusto language to retrieve detailed information about WSL instances and their interactions.
In the Advanced Hunting schema, under the DeviceInfo table there’s a new attribute called HostDeviceId that you can use to map a WSL instance to the Windows host its running on. Here are a few sample hunting queries:
Get all of your WSL devices IDs and hostname for the current organization/tenant
let wsl_endpoints = DeviceInfo
| where OSPlatform == "Linux" and isempty(HostDeviceId) != true
| distinct DeviceId, DeviceName;
wsl_endpoints
Get WSL device IDs and their corresponding host device IDs
DeviceInfo
| where OSPlatform == "Linux" and isempty(HostDeviceId) != true
| distinct WSLDeviceId=DeviceId, HostDeviceId
Get a list of WSL device IDs where python3.10 or snapd has run
let wsl_endpoints = DeviceInfo
| where OSPlatform == "Linux" and isempty(HostDeviceId) != true
| distinct DeviceId;
DeviceProcessEvents
| where FileName == "python3.10" or FileName == "snapd"
| where DeviceId in (wsl_endpoints)
| sort by Timestamp desc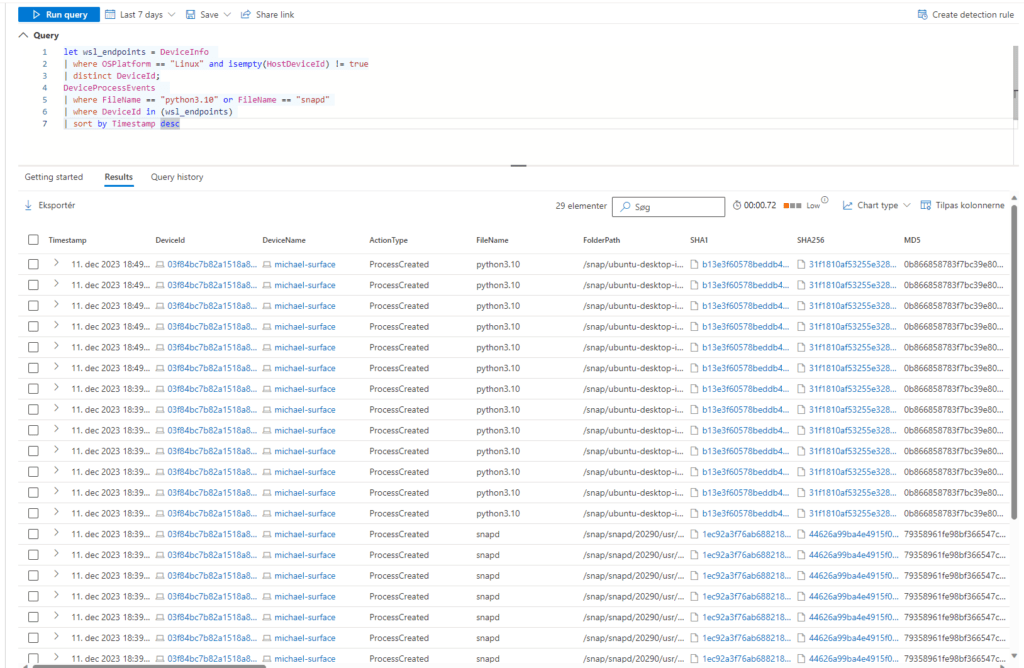
You can do this for etc. ping too or other commands/programs you will look for 🤪
If you have some nice one, let me know and if – I can add them here if wanted 😎
Troubleshooting
Address potential issues encountered during installation or operation using provided troubleshooting steps, such as rerunning health checks and generating support bundles if you need that – Microsoft support you over there for now in the preview phase – this will change later over time as normal.
- The command healthcheck.exe shows the output, “Launch WSL distro with ‘bash’ command and retry in 5 minutes.”
- If the previously mentioned error occurs, take the following steps:
- Open a terminal instance and run the command wsl.
- Wait for at least 5 minutes before rerunning the health check.
- The healthcheck.exe command might show the output, “Waiting for Telemetry. Please retry in 5 minutes.”If that error occurs, wait for 5 minutes and rerun healthcheck.exe.
- If you don’t see any devices in the Microsoft Defender portal or you don’t see any events in the timeline for avtions performed on the WSL container check this things:
- If you aren’t seeing a machine object, make sure sufficient time has passed for onboarding to complete (typically it can take up to 10 minutes).
- Make sure to use the right filters and you have the appropriate permissions assigned to view all device objects. (For example, is your account/group is restricted to a specific group?) – check the tag for any spell errors, as you type this in yourself – there is no build-in filter for it for now.. We hope it will come over time 😉
- Use the health check tool to provide an overview of overall plug-in health. Open Terminal, and run the healthcheck.exe tool from C:\Program Files\Microsoft Defender for Endpoint plug-in for WSL\tools.
- In case you have challenges or issues, open the terminal and run the following commands to generate the support bundle you can provide to Microsoft in the time of public preview
- In your console or Terminal, run the commend: cd “C:\Program Files\Microsoft Defender for Endpoint plug-in for WSL\tools”
- Run the command: .\healthcheck.exe –supportBundle to create the files Microsoft needs. The support bundle can be found in your local appdata folder in the temp folder.
Conclusion
I think this is a cool add-on for the WSL on your Windows host (if you are using it or at all allow users to install this – etc. if non administrators), as WSL was not covered at all before – and you had no visibility into your running instances of WSL!
It´s fun to be in the community and test this out, but also providing feedback to the team at Microsoft to help to make the products better from real world senarios (where possibel ofc.)
Thank you for taking the time to visit my blog. Kindly share it with others if you find it helpful for them! 😉🔐👍
Stay tuned for the new post about something cool! 🥳


